My daughter said she needed a baby hat to her pregnant teacher.
- What kind of hat do you want then?
- A giraffe hat my daughter told me and thought she was funny.
Ha, ha. Here it is.
Showing posts with label Animal hats. Show all posts
Saturday, February 7, 2015
Thursday, October 9, 2014
A Door Stopper
A Cat Door Stopper.
It could be a hat but it is a door stopper. Fill a bag with sand and put it inside this cat and you have a cute door holder.
Fyll en påse med sand och stoppa in den in i katten. Sy igen hålet och nu har du en söt dörrstopp.
Sunday, December 22, 2013
Finish up the Parakeet Hat
Here they are, all done. To change their look; change size on the eyes and beak or put the eyes further apart.
You can also put on braids to be sure to keep your ears warm.
Wednesday, December 4, 2013
How to make a parakeet hat.
When you are going to make a parakeet hat you should use two color.
After you finished crocheting the hat it is time for cutting out all parts in felt. You need;

2 white circles and 2 black circles for the eyes
1 brownish orange triangle for the beak
1 eight-shaped part for the top of the beak and
2 small ovals for the holes on the beak.
Now lay them out on the hat so you know where you want them. Pin them in right spot and sew them on with a thin tread in matching color.
Tips, Remember the eyes are going to move apart more when you put on the hat.
Sunday, November 24, 2013
Another Crochet Crazy Bird Hat
Another crazy bird hat. I like this one better. It seams like one eye gets bigger every time. I don't want to use a template because they will all look the same and they look more alive if they are a little bit off.
Ännu en knasfågel. Jag gillar denna bättre. Det verkar som ena pupillen alltid blir lite större på mössorna men jag vill inte använda en mall för då blir alla likadana och lite lika levande.
Saturday, November 2, 2013
Crochet Crazy Orange Bird Hat
A friend of mine wanted some bird hats so I made this crazy bird hat.
Tuesday, May 28, 2013
A strange cat hat for Phoenix Comicon
I needed a cat hat for my very simple costume for Phoenix Comicon 2013.
Soft kitty, warm kitty, little ball of fur.
Happy kitty, sleepy kitty, purr, purr, purr.
But I think my kitty is a creepy kitty.
Burr, burr, burr.
Saturday, May 4, 2013
Crochet Parakeet hat
Finally is the parakeet hat done. I think Evy is going to like it. It will be like caring an advertising sign for her birds on her head.
Så var undelatmössan äntligen klar. Har inte haft så mycket tid för virkandet på sista tiden.
Sunday, April 28, 2013
Funny Bird Crochet hat
I am crocheting a bird hat for our bird breeder friend, Evy. It was suppose to be a parakeet hat but it ended up as a funny bird. One more try I guess.
Jag skulle virka en undelatmössa till vår vän Evy som föder upp fåglar men det blev en rolig fågelmössa istället. Får försöka igen.
Wednesday, April 24, 2013
Ice Age Sid the Sloth Crochet hat
Got a request for a Sloth hat. A Sloth? You know like Sid in Ice Age. The funny not so smart animal, he is a Sloth. What do you think? Does it look like him?
There is a rumor going that there is going to be an Ice Age 5.
Fick en beställning på en Slothmössa. Du vet Sid från Ice Age, han är en sloth. Vet inte riktigt vad det djuret heter på svenska. Är det likt?
Monday, April 22, 2013
Small Frog on Log
Another frog on the log. This one is smaller. I think it is pretty cute.
Litoria chloris, also commonly known as the red-eyed tree frog or orange-eyed tree frog, is a species of tree frog native to eastern Australia; ranging from north of Sydney to Proserpine in mid-northern Queensland.
Wednesday, April 17, 2013
How to make a ladybug hat continues
Next step is to decide how many spots your ladybug should have and how big. I like to add a "head" in the front of the hat. I cut out my spots and head in felt. Sew on the spots on one side and mirror the spots on the other side.
Nästa steg är att bestämma hur många och hur stora prickarna ska vara. Jag gillar att använda filt till detaljerna. Ifall man virkar detaljerna blir de så tjocka. Jag brukar sätta på ett litet huvud fram på kroppen.
Virka sedan en svart kedja tillräckligt lång för att räcka från ena sidan till den andra. Vik mössan så att du kan hitta mitten och sy på kedjan.
After about 3-4 inch put the hat on a doll to make sure the hat can be stretch out without any problems from the black chain line across the hat. Keep sewing and keep checking.
När du sytt på några centimeter sätt mössan på en docka så att den sträcks ut kontrollera att kedjan inte ställer till med problem.
Nästa steg är att bestämma hur många och hur stora prickarna ska vara. Jag gillar att använda filt till detaljerna. Ifall man virkar detaljerna blir de så tjocka. Jag brukar sätta på ett litet huvud fram på kroppen.
I like my ladybug hat to be parted by a black line. Crochet a chain that is long enough to go from one side to another. Fold the hat so you can find the middle of the hat and sew on the chain.
Virka sedan en svart kedja tillräckligt lång för att räcka från ena sidan till den andra. Vik mössan så att du kan hitta mitten och sy på kedjan.
När du sytt på några centimeter sätt mössan på en docka så att den sträcks ut kontrollera att kedjan inte ställer till med problem.
Here is the reason to why you should have a head in front and why you should put it on the last thing you do. To cover up beginning of the antennae.
Här är en bra orsak till varför du bör sätta på huvudet sist, för att dölja var antennerna börjar. Se också hur svajig linjen är, det är svårt att få den rak, ha inte bråttom när du syr på den.
Sunday, April 14, 2013
How to make a ladybug hat
Making a ladybug hat is pretty simple. First crochet a red hat. I like to add a black edge.
Next step is to make the antennae and decide how they should look. Make a chain long enough for one antennae. Crochet it hard to make it look nice and even. Pull one of the ends through a hole where you want it and place it the way you like it on the hat. Pull the other end of the chain through the hat so the start and the end of the chain is on the revers side of the hat. Use regular sewing thread to attach the antennae to the hat. Make sure the ends of the chain is secured at the inside and if the chain turned out to be too long cut of the part you do not need after you made sure it is fastened nicely.
Nästa steg är att göra antennerna och bestämma hur de ska se ut. Virka en kedja lång nog för en antenn. När du virkar kedjan var noga med att virka den lika hårt hela tiden så den blir jämn och fin. Stoppa in ena änden av kedjan fram på mössan, lägg ut kedjan så som du vill att antennen ska vara formad och stoppa sedan den andra änden genom ett hål så att båda ändarna av kedjan är på avigsidan. Använd sytråd och sy fast antennen. Sy fast kedjans ändar på avigsidan. Ifall kedjan blivit för lång kan man klippa av den efter man sytt fast den noga. Tänk på att den kan repa upp sig ifall man klipper av den så försök att undvika detta.
More about ladybugs hats another day. Mer om nyckelpigsmössor en annan dag.
Friday, April 5, 2013
Thursday, April 4, 2013
Ladybug hat
Spring is here and the nature is full of bugs. Here is a ladybug I made.
Våren är här och naturen vimlar av småkryp.
Saturday, March 30, 2013
Frog on the log hat
Here is my frog hat. Funny. I wanted to do a Tree frog but something went wrong with the face. I will try again. Practice makes perfect.
Sunday, March 17, 2013
Crochet Owl hat
After the square shaped owl hat I wanted to do an owl hat the regular way. It is very cute but I don't know if it looks like an owl.
Efter den fyrkantiga ugglan ville jag prova att virka en ugglemössa på vanligt vis. Så här blev den, söt, men jag vet inte om det liknar en uggla precis.
Thursday, March 14, 2013
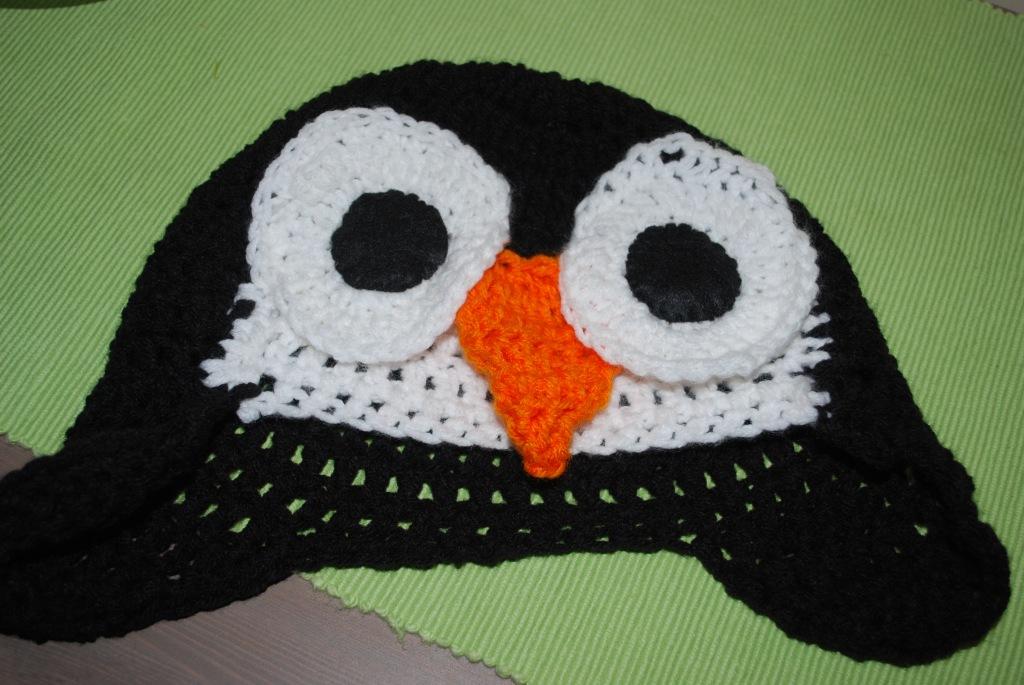
Penguin hat/ Pingvinhatt
I love penguins but I think I need some more practice making penguin hats.
Jag gillar verkligen pingviner men jag tror jag behöver lite mer träning på att göra pingvinmössor.
Wednesday, March 13, 2013
Owl hat Square form/ Ugglehatt
A friend wanted a owl hat. I wanted to make a square shaped one so I decided to knitt it. I just knitted a rectangel and then sew it together at the sides. I just love how the hat looks on the upside down bowl. The tulip on the bowl looks likes the owl's foot.
En kompis ville ha en ugglehatt och jag bestämnde mig för att göra en fyrkantig hatt.
Först stickade jag ett rektangulärt stycke. Resår i grått, sedan brunt och till sist resår i grått igen. Sedan sydde jag ihop hatten i sidorna, satte på tofsar, ögon och näbb.
Jag är mycket nöjd med hur den blev. Vad som är svårast med den här sortens mössa är att bedömma hur lång man ska göra rektangeln. Göra man rektangeln för kort blir mössan inte tillrikligt djup/stor (även om den är bred) och slutar vid ögonbrynen.
Monday, March 11, 2013
Dolphin hat
There can only be one.
This hat was so much work with. I moved the nose three times until I was satisfied with it.
Den här hatten var så jobbig att göra. Så många delar. Jag sydde på nosen tre gånger innan jag blev nöjd. Men jag tycker den blev väldigt fin.
Subscribe to:
Posts (Atom)